English
 Deutsch
 简体中文
简体中文 languages

Here's a practical, step-by-step guide to replacing door hinges:
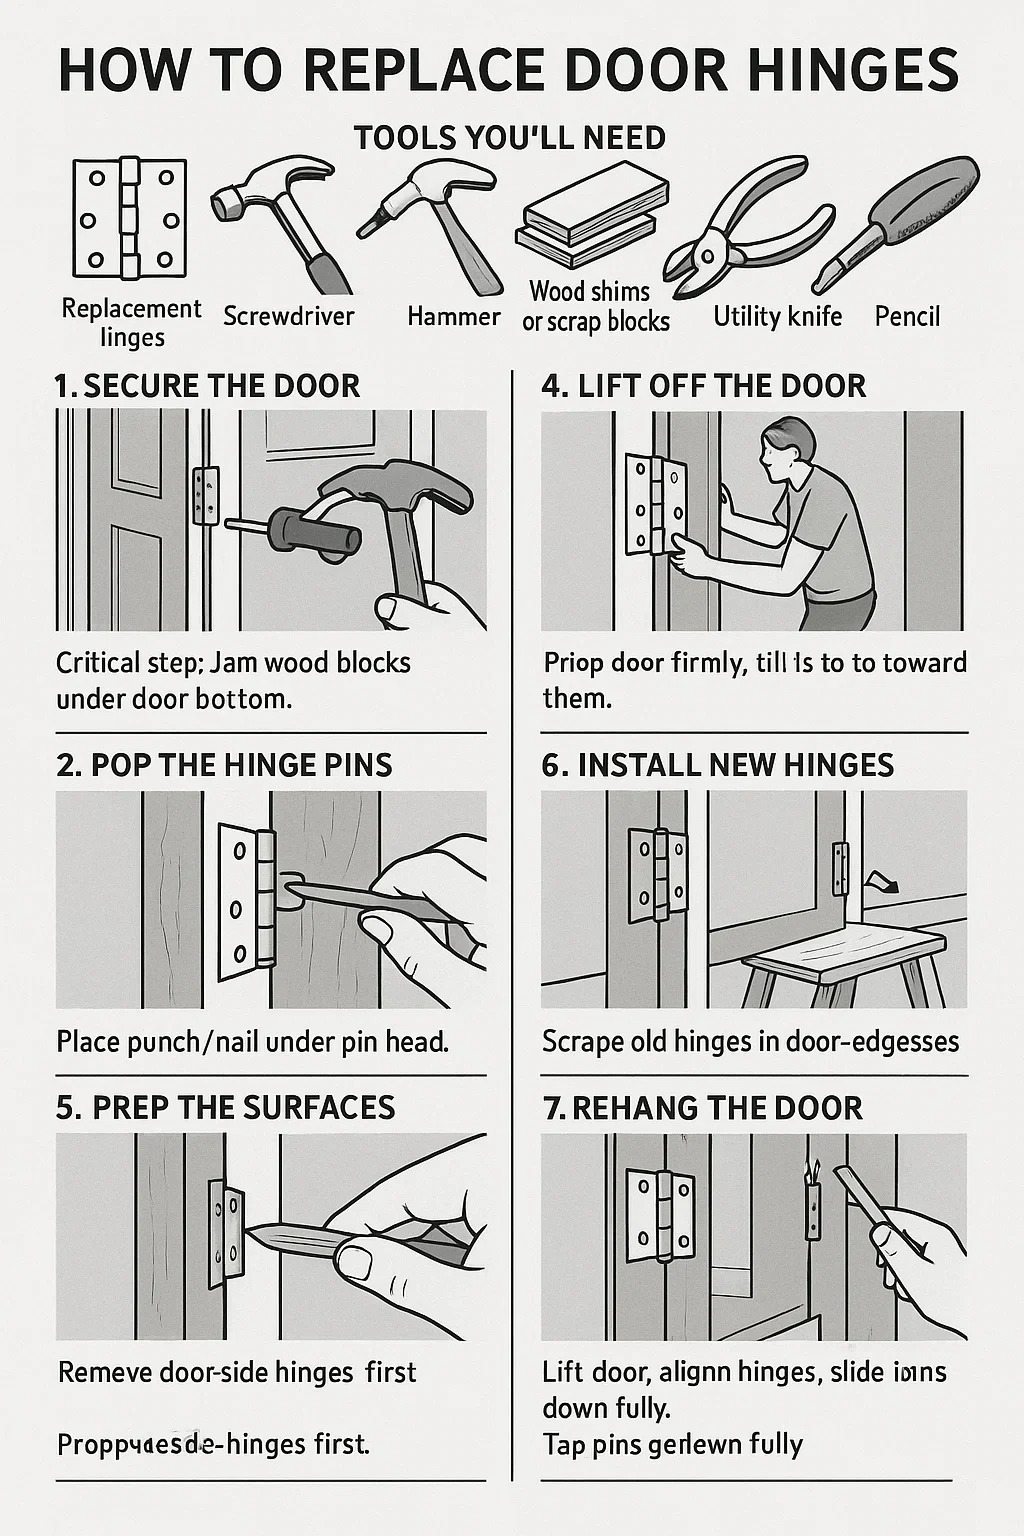
Tools You'll Need
Replacement hinges (match existing size: measure width/length)
Screwdriver (Phillips or flat-head)
Hammer
Nail punch or thick nail
Wood shims or scrap blocks
Utility knife
Pliers (if screws strip)
Pencil
Step-by-Step Replacement
1.Secure the Door
Critical step: Jam wood blocks under the door bottom.
Remove doorstop molding if it blocks hinge access.
2.Pop the Hinge Pins
Place punch/nail under pin head.
Hammer upward until pin slides out.
Stuck? Spray WD-40 on pin base, wait 10 mins, then tap hinge side-to-side while lifting the door.
3.Lift Off the Door
Grip door firmly, tilt top toward you.
Lift straight up to detach from hinges.
Lay door flat on sawhorses/stable surface.
4.Remove Old Hinges
Unscrew door-side hinges first (attached to door edge).
Then remove frame-side hinges.
Stripped screws? Grip heads with pliers while turning.
5.Prep the Surfaces
Scrape old paint/gunk from hinge recesses with utility knife.
Sand wood cavities lightly for smooth contact.
6.Install New Hinges
Door first:
Align new hinges in door-edge recesses.
Insert one screw per hinge loosely.
Check hinges are flush with door edge.
Tighten all screws once aligned.
Frame next:
Prop door back into opening with shims under bottom.
Slide frame-side hinges onto door pins.
Insert one top screw per hinge into frame.
Test door swing – adjust hinge position if binding.
Tighten all screws.
7.Rehang the Door
Lift door, align hinges, slide pins down fully.
Tap pins gently with hammer if stiff.