English
 Deutsch
 简体中文
简体中文 languages

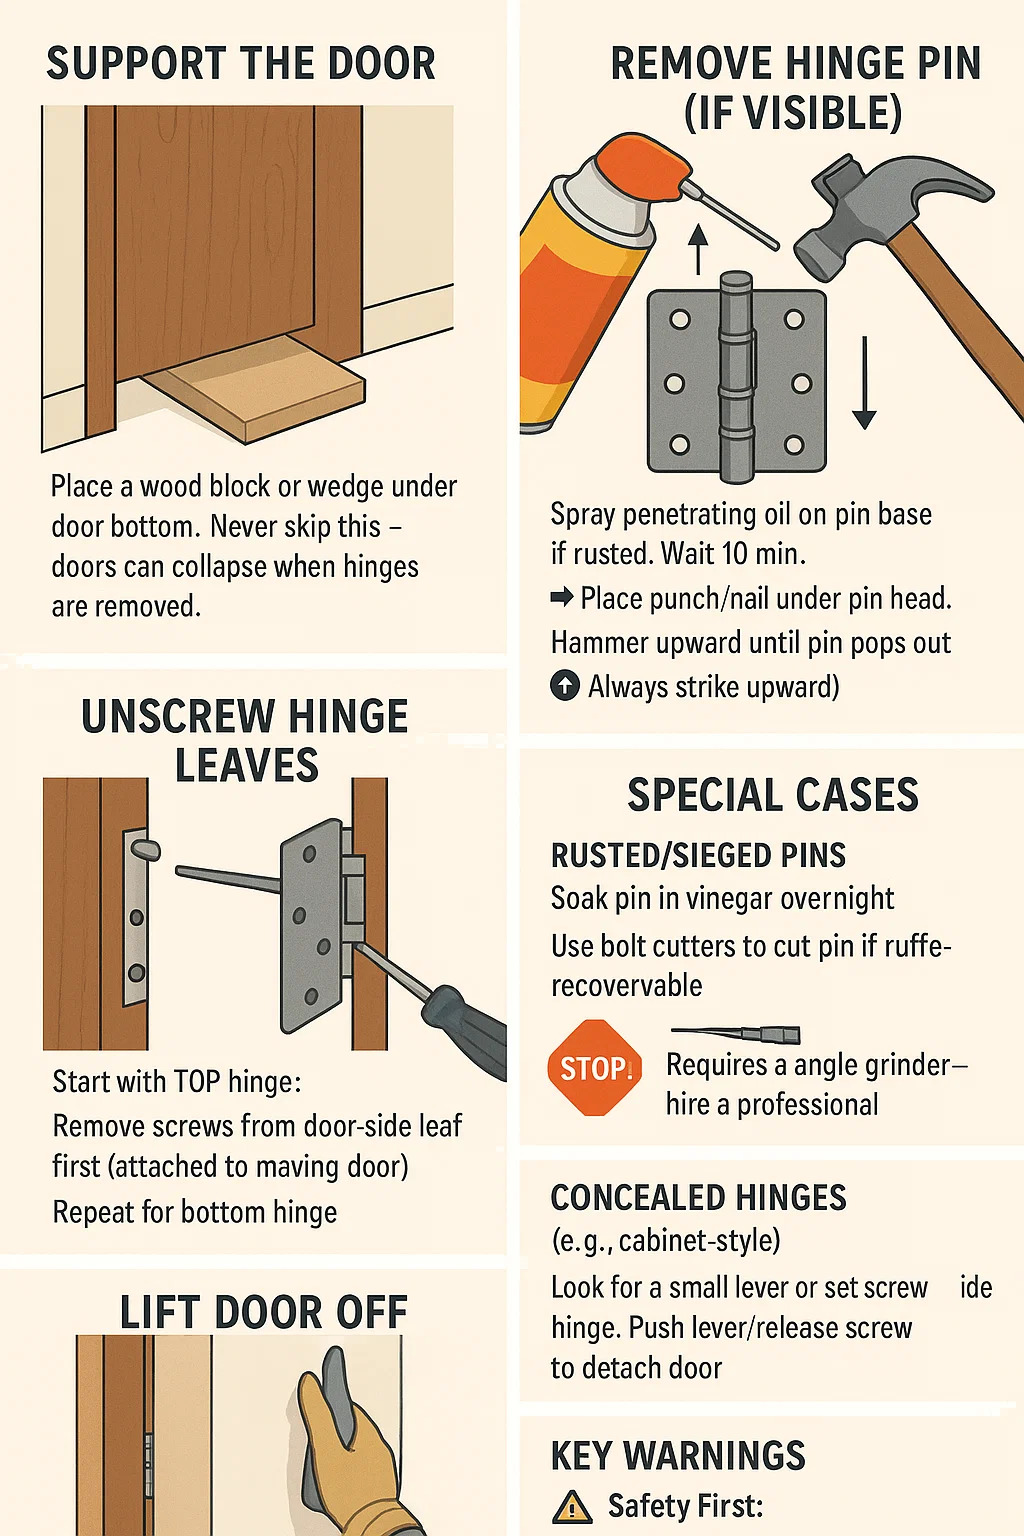
Here's a step-by-step guide to removing a door hinge, focusing on practical methods and safety:
Tools Needed
Phillips/flat-head screwdriver (match screw size)
Hammer
Punch or thick nail (for pinned hinges)
Wood block/shims (to support door)
Pliers (optional, for stubborn screws)
WD-40/penetrating oil (if rusty)
Removal Steps
Support the Door
Place a wood block or wedge under the door bottom.
Never skip this – doors can collapse when hinges are removed.
Remove Hinge Pin (If Visible)
Spray penetrating oil on pin base if rusted. Wait 10 mins.
Place punch/nail under pin head.
Hammer upward until pin pops out (⬆️ Always strike upward).
If pin won’t budge: Tap hinge sideways with hammer while pulling the door open/closed to loosen.
Unscrew Hinge Leaves
Start with TOP hinge:
Remove screws from door-side leaf first (attached to moving door).
Then remove frame-side leaf screws.
Repeat for bottom hinge.
Stuck screws?
Spray WD-40 on threads.
Press screwdriver firmly into the slot to prevent stripping.
Use pliers to grip screw head if stripped.
Lift Door Off
Once all pins/screws are out:
Tilt door top toward you.
Lift straight up to clear hinge leaves.
Special Cases
Rusted/Sieged Pins:
Soak pin in vinegar overnight.
Use bolt cutters to cut pin if unrecoverable (replace later).
Welded Hinges:
Stop! Requires angle grinder – hire a professional.
Concealed Hinges (e.g., cabinet-style):
Look for a small lever or set screw inside the hinge.
Push lever/release screw to detach door.
Key Warnings
Safety First:
Wear gloves – sharp metal edges are common.
Protect eyes from falling debris.
Avoid Damage:
Never force screws – stripped heads make removal harder.
Place cardboard below to protect floors from dropped pins/tools.
Reinstallation Tip:
Label hinges (Top/Bottom) with tape – identical hinges can have subtle wear differences.